No products in the cart.
SAME DAY DISPATCH
FREE UK DELIVERY ON ORDERS OVER £59.99*DETAILS
30 DAY RETURN

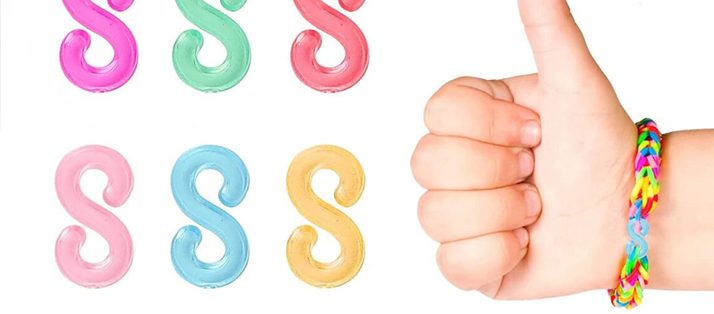
Loom bands are a fun and easy craft that can be made with just a few simple materials. One of the best ways to make loom bands is by using plastic S clips, which are small, easy-to-use clips that can be used to hold the bands together. In this blog post, we will go over the steps to make your own loom bands with plastic S clips.

Before you begin, you will need to gather the materials that you will need to make your loom bands. You will need:
Loom bands (can be purchased in craft stores or online)
Plastic S clips (can be purchased in craft stores or online)
A loom board or a loom band tool


Once the loom board is set up, you can start choosing your colors. Loom bands come in a variety of colors, so you can choose the colors that you like the most. You can also mix and match different colors to create unique patterns.

Once you have chosen your colors, you can begin making the loom bands. To start, take a rubber band and place it over the first clip on the loom board. Then, take the second rubber band and place it over the second clip. Repeat this process until you have a row of rubber bands on the loom board.
Next, you will need to repeat the process to make the second row of loom bands. To do this, take the first rubber band from the first row and place it over the second clip on the second row. Then, take the second rubber band from the first row and place it over the third clip on the second row. Repeat this process until you have a second row of rubber bands on the loom board.
Repeat the process of making rows until you have the desired number of rows. You can make as many rows as you want, depending on the size of your loom band.
Once you have finished making the loom bands, you can remove them from the loom board.
Tips:
In conclusion, making loom bands with plastic S clips is a fun and easy craft that can be enjoyed by people of all ages. With just a few simple materials and some basic instructions, you can create your own unique and colorful bracelets and accessories. So gather your materials, set up your loom, and start weaving.
Featured Products
Rushbazaar is an online e-commerce platform dedicated to the latest in fashion and lifestyle goods in the US.
Learn More >